
티스토리 뷰
RunPod Serverless
개인 프로젝트나, 개인적으로 LLM을 써보고 싶을 때 GPU가 없을 경우가 많다.
서버를 빌리자니 GPU 서버 호스팅 비용도 비싸서 부담이 된다.
그럴 때 RunPod Serverless를 생각해보자.
Serverless는 서버에 요청이 들어왔을 때만 GPU가 실행된다.
또 GPU가 작동한 초당 사용량으로 비용을 지불한다.
GPU 서버를 통째로 빌렸을 때보다 유연하게 사용할 수 있다.
RunPod serverless vLLM Endpoint를 이용해서 HuggingFace 모델을 클라우드에서 실행할 수 있다.
단 vLLM은 gguf 파일을 지원하지 않기 때문에 다른 방법을 찾아야한다.
Docker로 image를 배포 후 컨테이너를 RunPod Serverless에 빌드할 수 있다.
링크를 참고하여 Ollama로 gguf 모델을 클라우드에서 실행할 수 있다.
https://medium.com/@pooya.haratian/running-ollama-with-runpod-serverless-and-langchain-6657763f400d
Running Ollama with Runpod Serverless and LangChain
Ollama is one of the easiest tools to run LLMs locally. However, you may consider running on the cloud in order to get a faster response or…
medium.com
주의할 점
- serverless로 최대 12시간까지 연결할 수 있다. 너무 긴 훈련은 적절하지 않을 수 있다. 학습한 모델 체크포인트도 저장되지 않을 수 있으니 외부에 백업을 해두자. 참조
로그인
RunPod - The Cloud Built for AI
Develop, train, and scale AI models in one cloud. Spin up on-demand GPUs with GPU Cloud, scale ML inference with Serverless.
www.runpod.io

- 먼저 RunPod에 로그인한다.
금액 충전

- 좌측 Billing에서 돈을 충전한다.
Serverless vLLM

- Serverless vLLM을 선택한다.
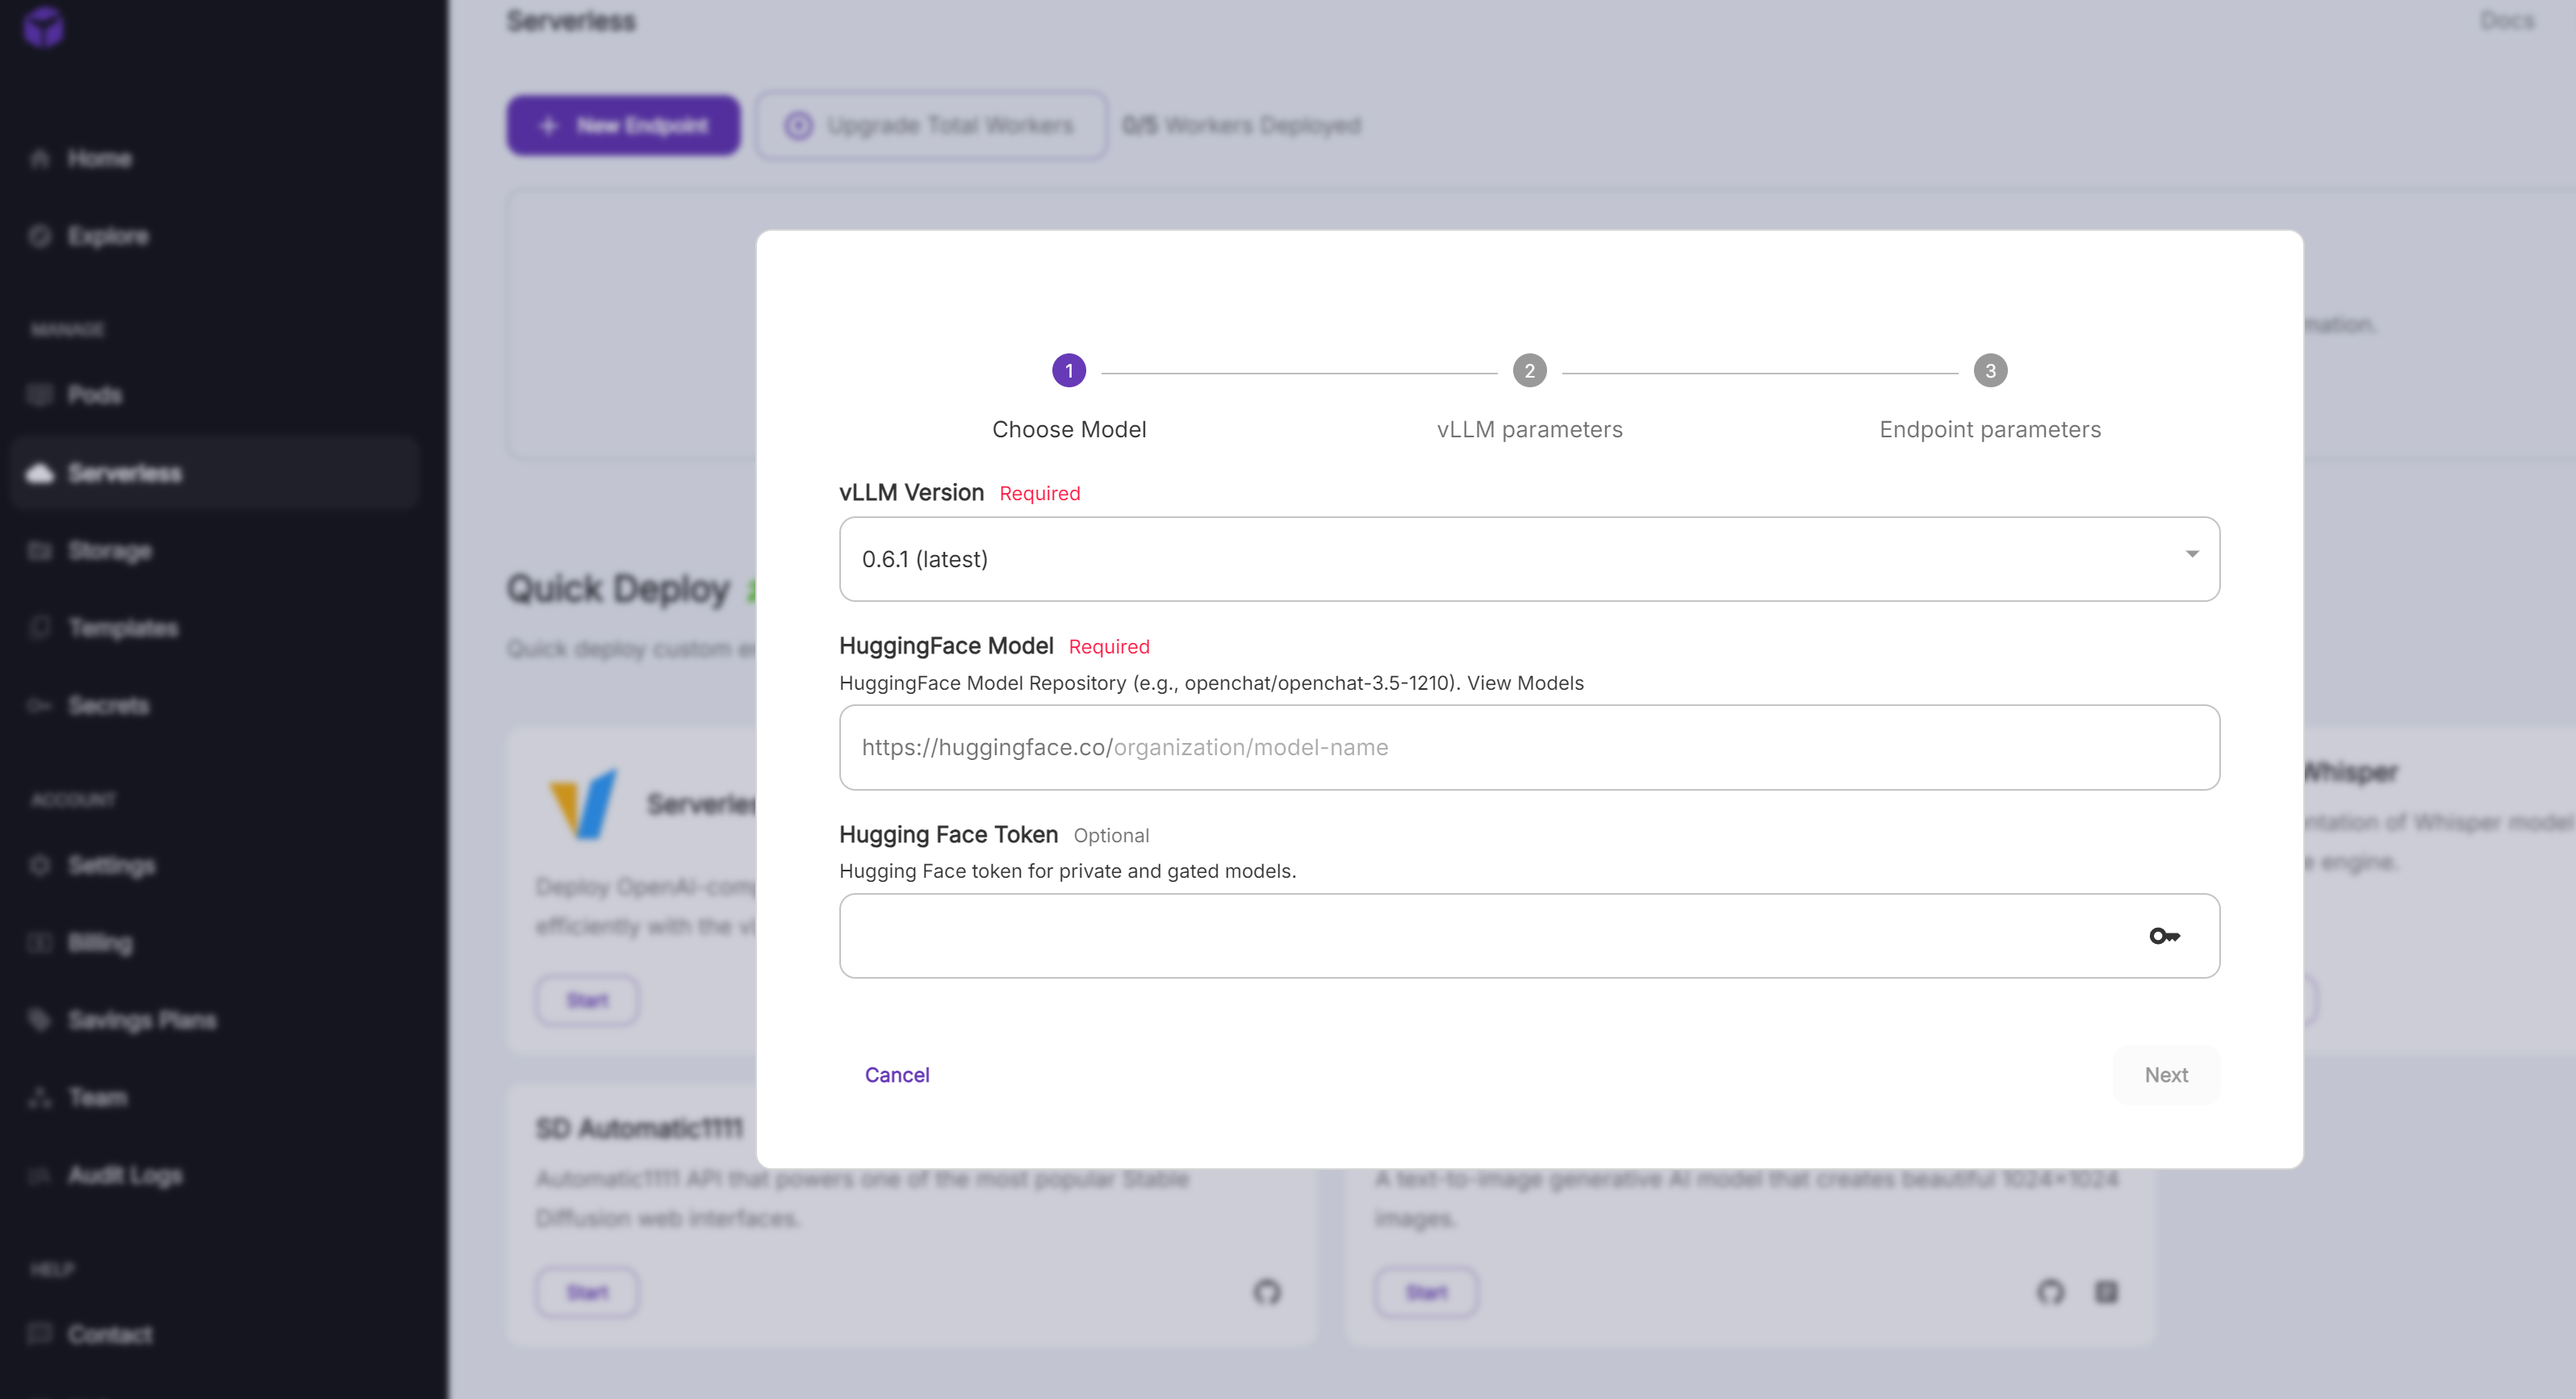
- 사용할 HuggingFace Model을 입력한다. google/gemma-2-9b-it를 예시로 사용한다. Gemma는 access token이 필요하여 같이 입력한다. 토큰이 필요 없으면 입력하지 않아도 된다.
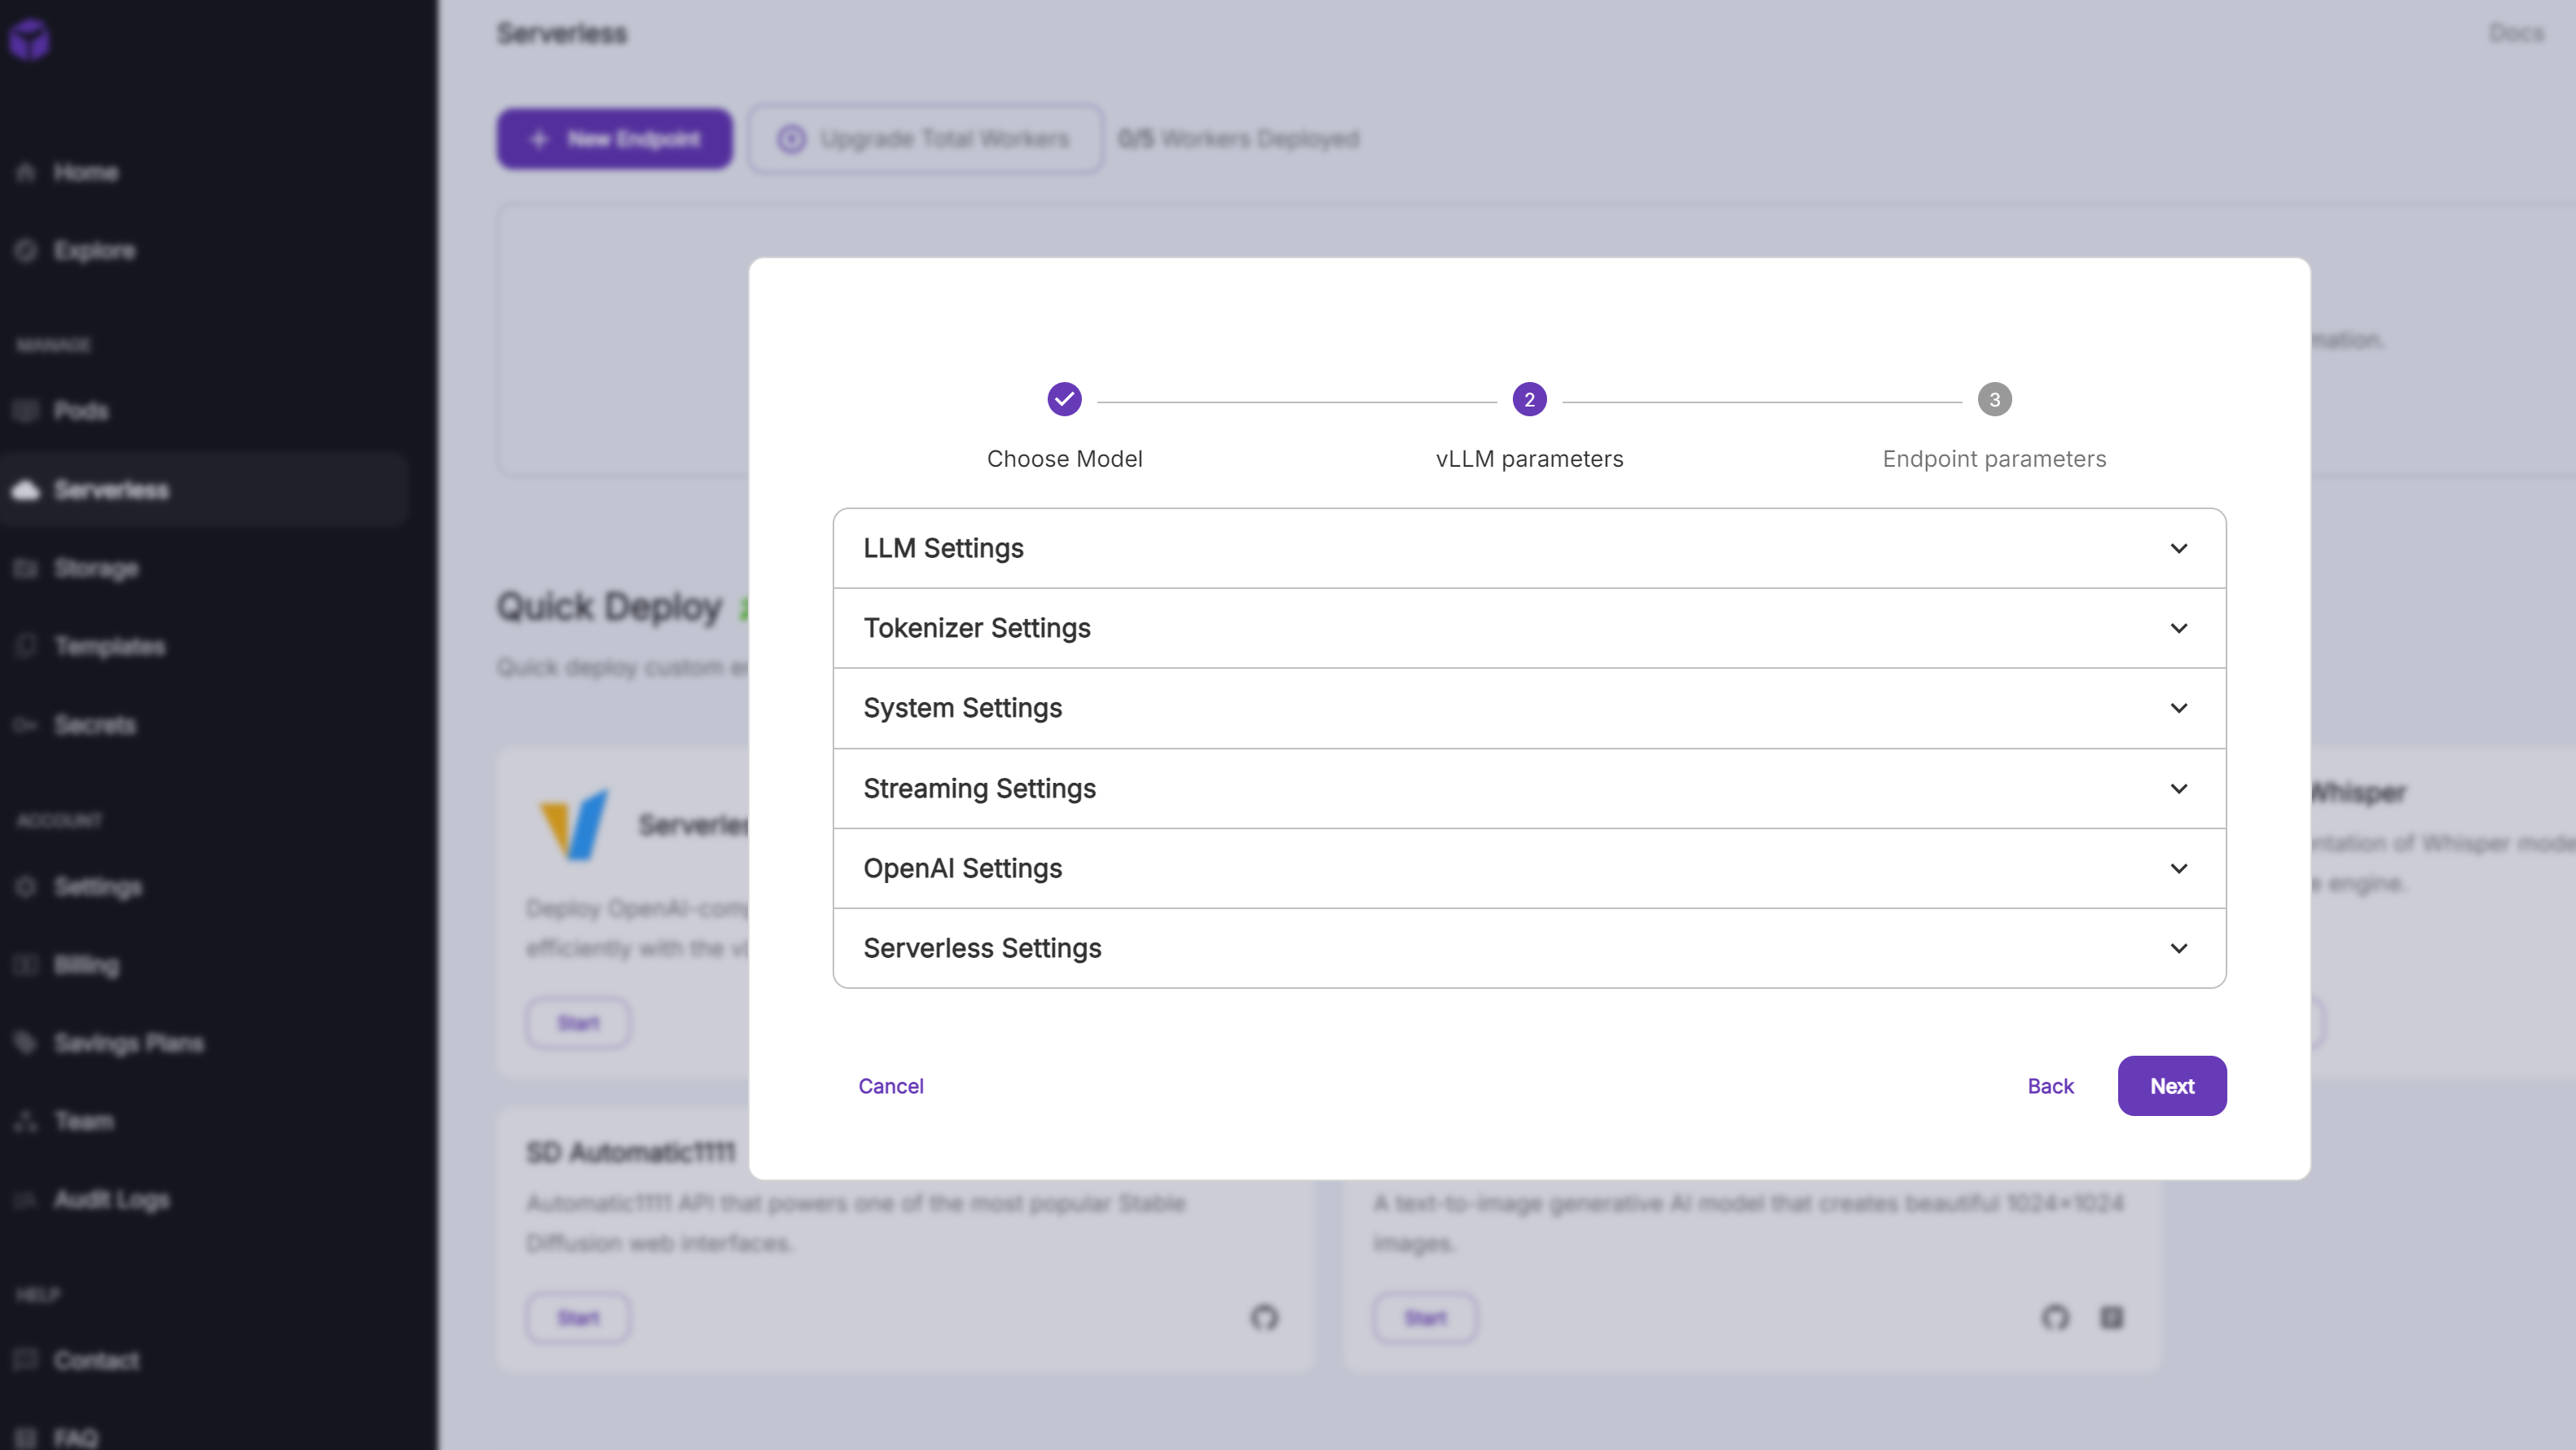
- vLLM parameters를 입력한다.
- 입력하지 않고 넘어가도 실행이 된다.

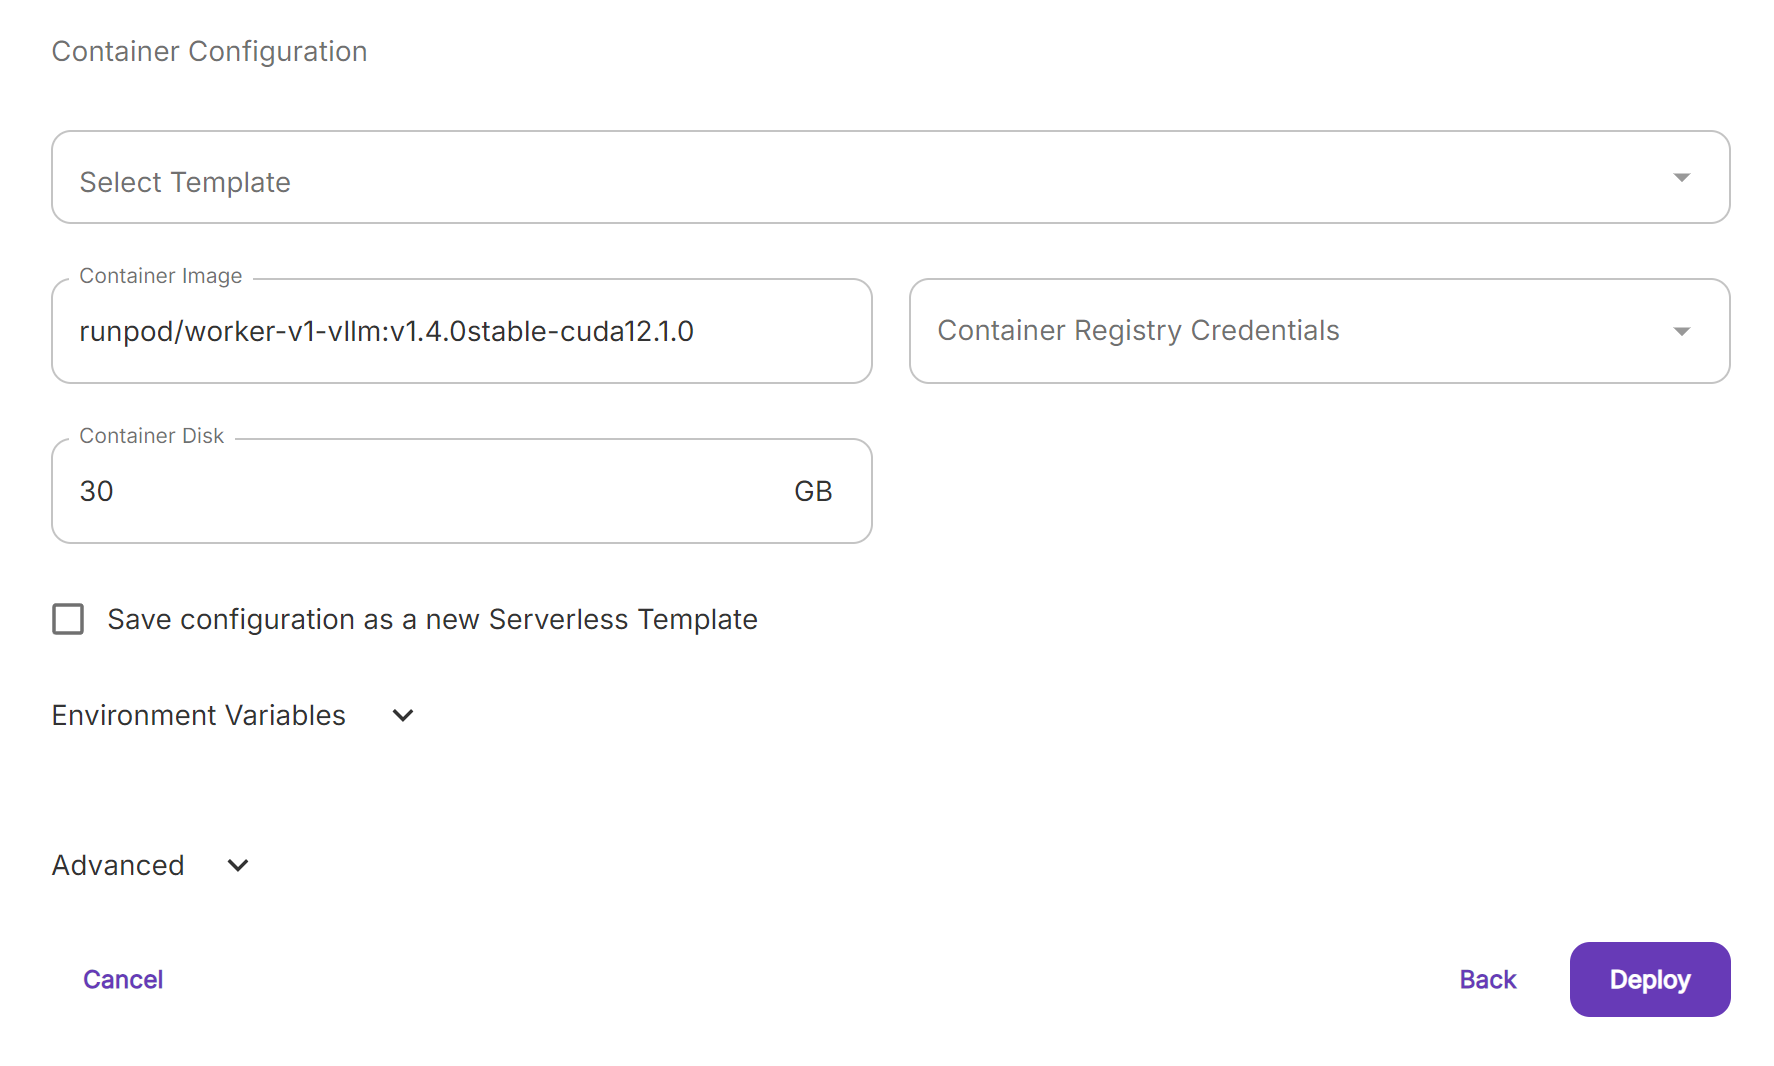
- Endpoint Name을 마음대로 정한다.

- 사용할 GPU를 선택한다.
- Container Disk도 부족하지 않게 선택한다. 모델이 올라가지 않아서 작동하지 않을 수 있다.
- 아래 링크에서 간단히 google/gemma-2-9b-it로 필요한 GPU 메모리를 알아보니 float16으로 inference할 때 대략 21GB의 메모리가 필요해 보인다. deploy 후에 GPU를 변경하거나 추가할 수 있으니 일단 24GB GPU를 선택했다.
- https://huggingface.co/spaces/Vokturz/can-it-run-llm
Can You Run It? LLM version - a Hugging Face Space by Vokturz
huggingface.co
- Deploy한다. 이후 모델 다운로드가 시작된다. 다운로드까지 시간이 걸릴 수 있다.

- log를 확인할 수 있다. error message도 확인할 수 있다.
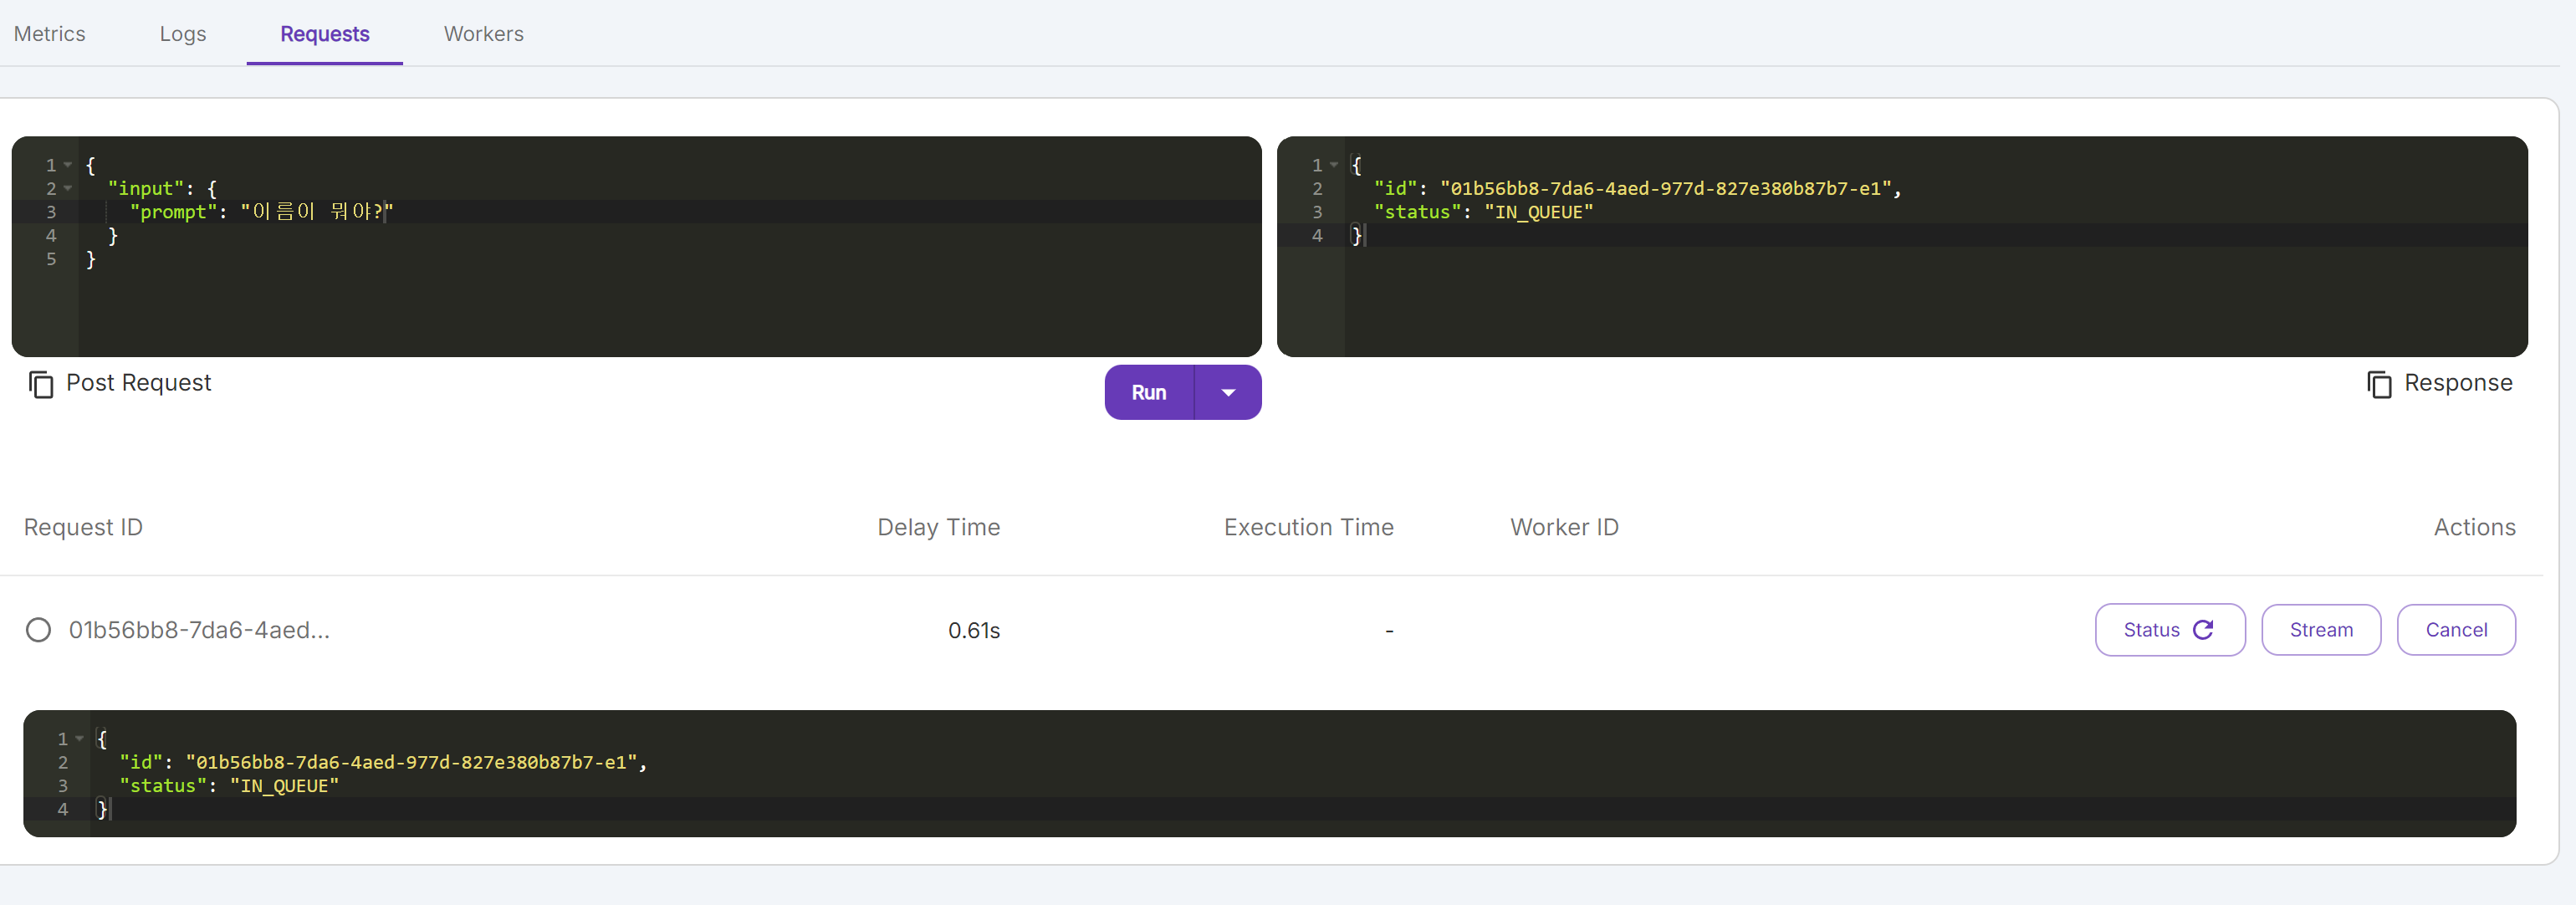
- 다운로드가 완료되면 하단의 Requests에서 inference를 해볼 수 있다. IN_QUEUE 면 작업 중이다.
- 첫 Requests일 때 시간이 걸릴 수 있다.
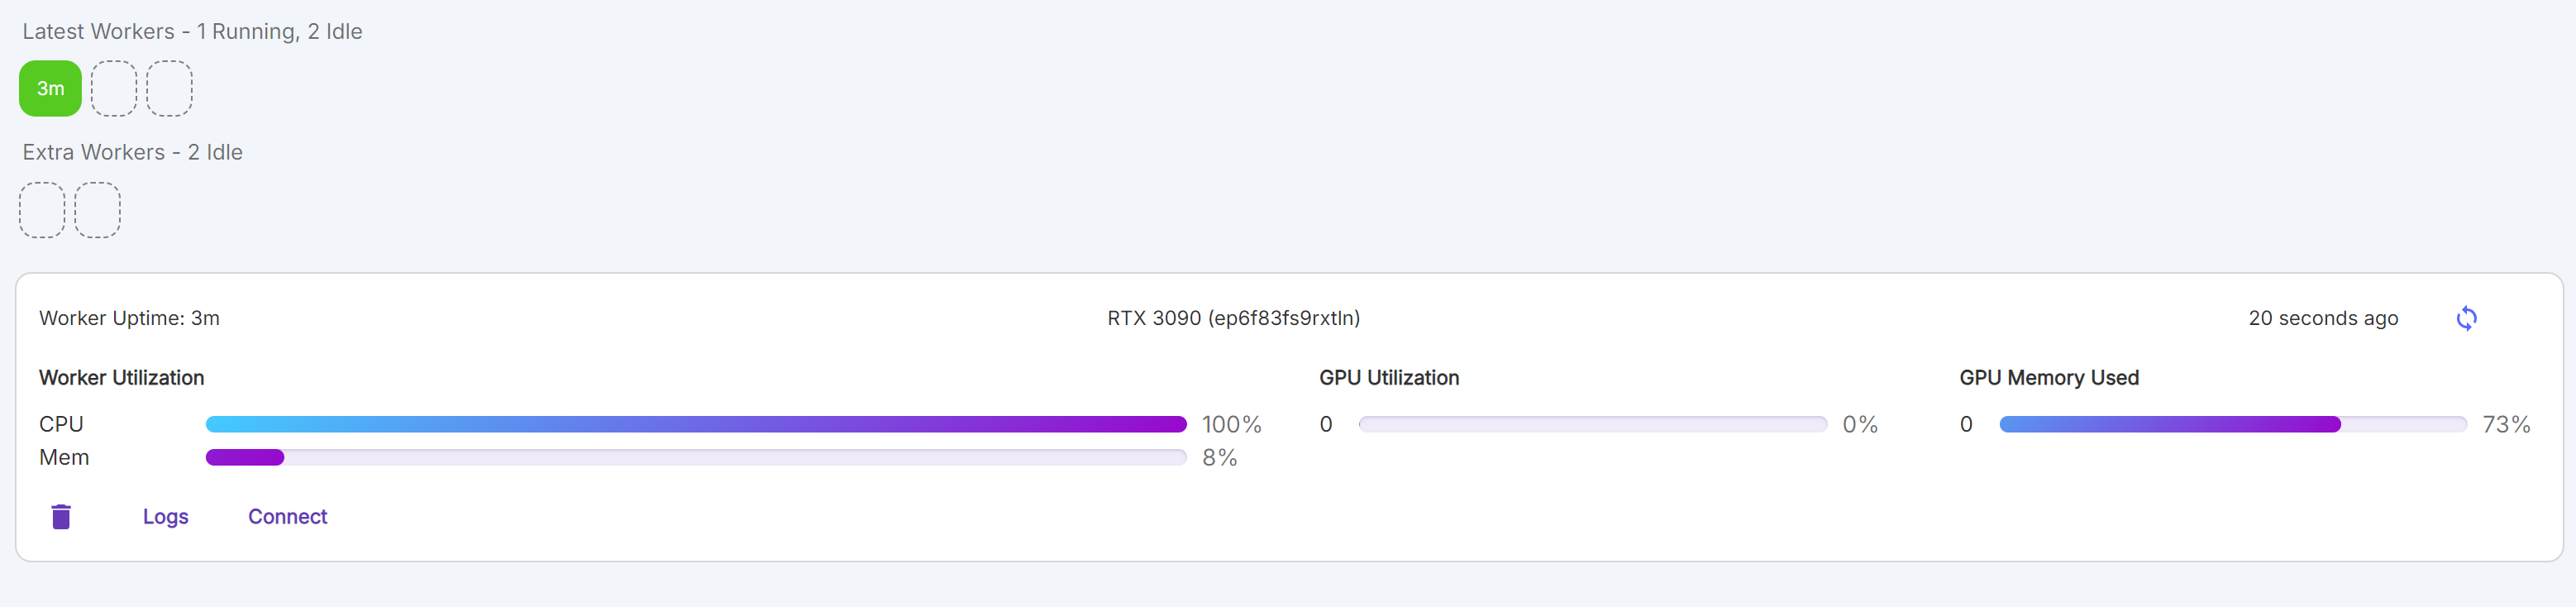
- Wokers를 누르면 현재 memory를 확인할 수 있다.

- 연산이 끝난 Status를 누르면 답변을 확인할 수 있다.
Vscode로 local PC와 연결하기
.env 파일에 API key, URL 저장
- 먼저 Local에 .env 파일을 만든다.
# .env
RUNPOD_BASE_URL=OpenAI URL을 입력하세요
RUNPOD_API_KEY=Setting에서 발급한 API Key를 입력하세요
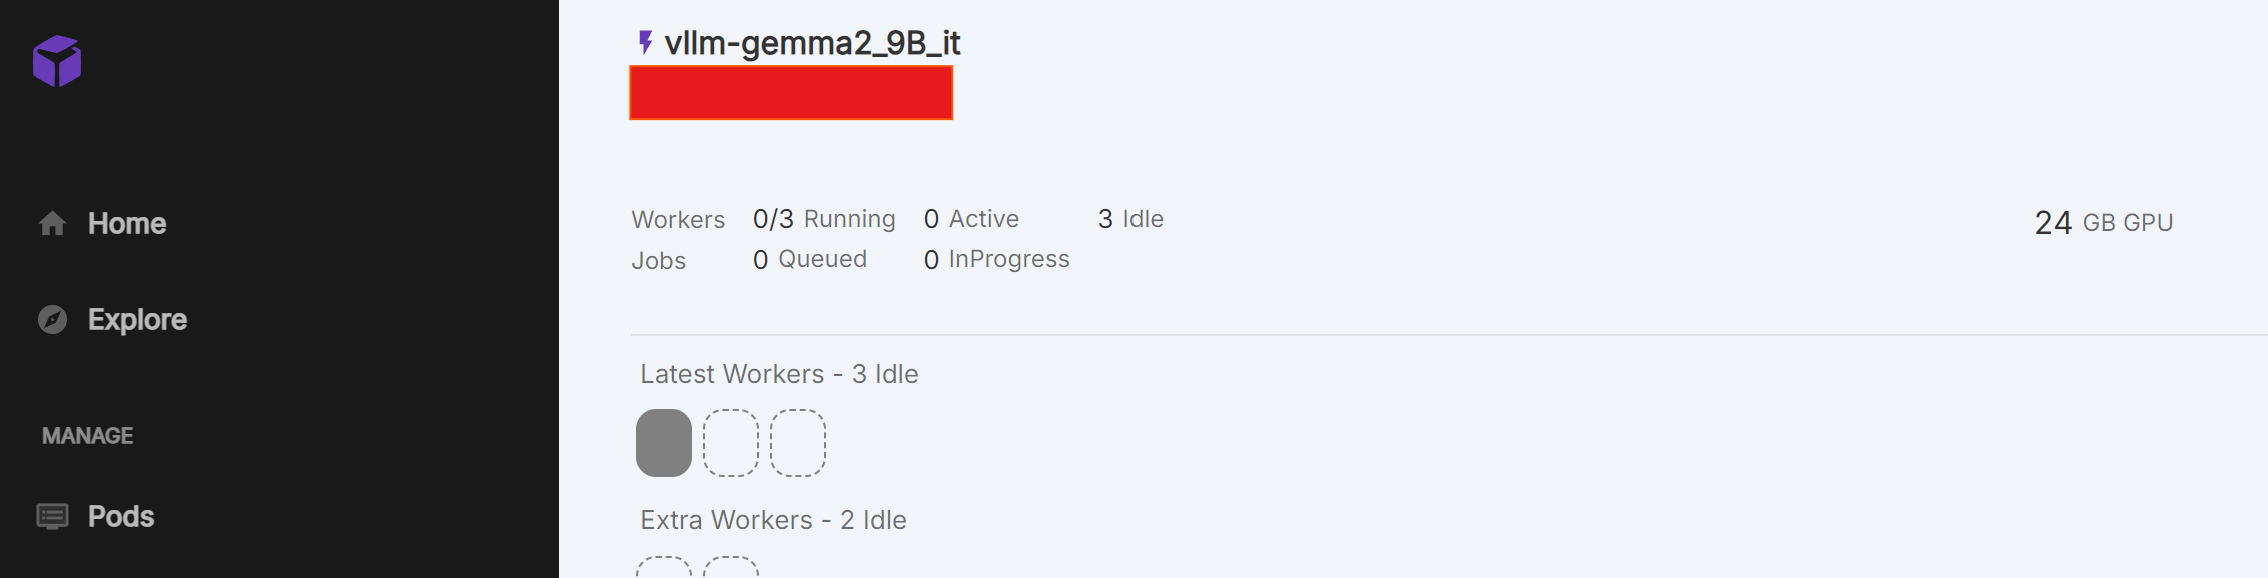
- 상단에 아까 정한 Endpoint name이 있다. (vllm-gemma2_8B_it)
- Endpoint name 바로 밑에 Endpoint ID가 있다. (빨간 박스)
- 이 글은 OPENAI BASE URL을 이용한다. .env의 RUNPOD_ BASE_URL에 저장한다.
- URL로 local과 Serverless Pod과 연결할 수 있다.
선택
- Eundpoint URL에 Endpoint ID가 입력된다.(빨간 박스가 Endpoint ID)
- RUNPOD_ BASE_URL 대신 RUNPOD_ENDPOINT_ID 를 .env에 저장하고 code에서 URL에 입력해도 된다.
- https://docs.runpod.io/serverless/workers/vllm/get-started#run-your-code
# Endpoint URL
https://api.runpod.ai/v2/{endpoint_id}/{operation}- api.runpod.ai: RunPod에 접근하는 Base URL
- v2: API version.
- endpoint_id: Serverless Endpoint의 ID
- operation: Serverless Endpoint에서 수행할 작업
- 옵션: run | runsync | status | cancel | health | purge-queue
Accout key 발급

- 좌측 Settings에서 API Key를 발급하고 .env에 RUNPOD_API_KEY에 저장한다.
Request 보내기

# !pip install openai

import os
from openai import OpenAI

client = OpenAI(
        base_url=os.environ.get("RUNPOD_BASE_URL"),
        api_key=os.environ.get("RUNPOD_API_KEY"),
    )

response = client.chat.completions.create(
    model="google/gemma-2-9b-it",
    messages=[{"role": "user", "content": f"점심 메뉴 추천해줄래?"}],
    temperature=0,
    )

print(response.choices[0].message.content)
# RUNPOD_BASE_URL이 아닌 RUNPOD_ENDPOINT_ID를 .env에 저장했을 때 client 코드를 변경합니다.
endpoint_id=environ.get("RUNPOD_ENDPOINT_ID")
client = OpenAI(
api_key=os.environ.get("RUNPOD_API_KEY"),
base_url=f"https://api.runpod.ai/v2/{endpoint_id}/openai/v1",
)
response = client.chat.completions.create(
model="google/gemma-2-9b-it",
messages=[{"role": "user", "content": f"점심 메뉴 추천해줄래?"}],
temperature=0,
)
print(response.choices[0].message.content)- openai 를 설치한다.
- 위의 코드 중 .env파일의 key에 맞게 실행한다.
- OpenAI chat completion 변수를 사용할 수도 있다. 아래 링크 참조
- https://platform.openai.com/docs/guides/chat-completions
Error message

- Error로 인해 답변이 돌아오지 않을 때가 있다.
- 위의 response 변수에 message를 살펴보면 해결 방법을 확인할 수도 있다.